 Drops from A to Z
This documentation covers an overview of how Customer Drops are handled in OpsAdmin.
Call Center / Internally Initiated Drops
In these sections, users will be given an overview of Outbound Drops:
What an account looks like when a drop has been received (records, statuses)
Drop Manager
In this documentation, users will be given an overview of:
Actions available in the Drop Manager
How to add or update the Call Dispositions for a record in the Drop Manager
How to configure the Call Disposition list items to be available to Agents
How an agent submits an outbound drop on an active account in OpsAdmin
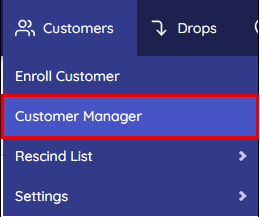
Navigate to the Customer Manager, via the Customers Menu item in OpsAdmin
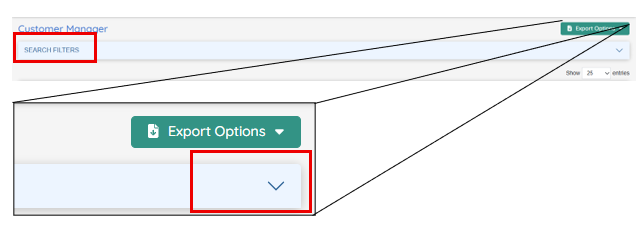
Click on the down arrow on the right hand side of the SEARCH FILTERS bar, and retrieve the record using one of the search fields available:
Once the record is retrieved, select the 3 dots on the right, and select ‘View Details’
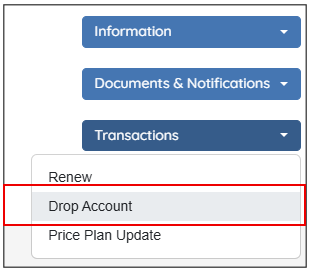
From the Customer Details screen, click on the blue tab named ‘Transactions’ and select ‘Drop Account’.
Before a Drop Transaction can occur on an account (i.e., in order for the ‘Drop Account’ option to appear), the account must have a status = Active. Users of OpsAdmin are encouraged to access the based on their billing system using the following .
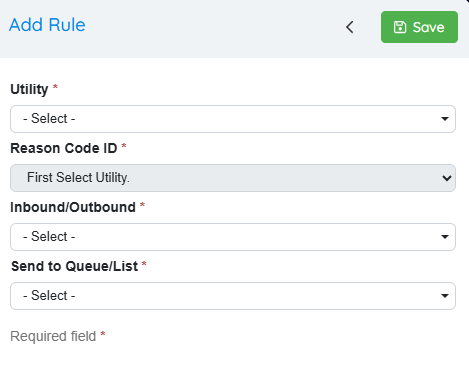
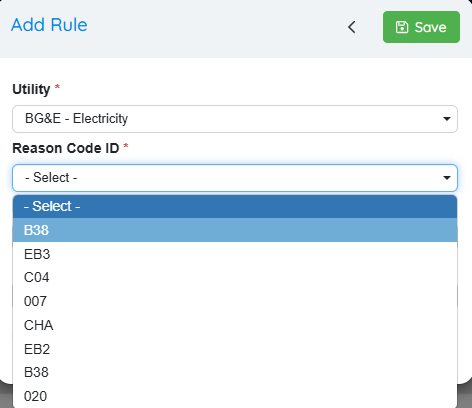
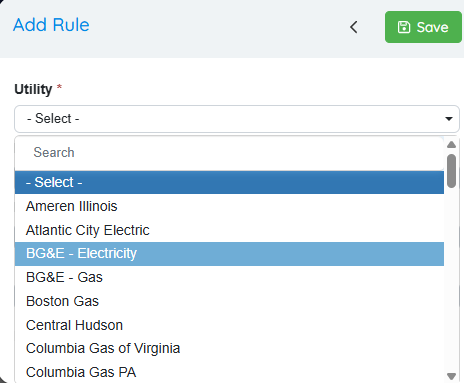
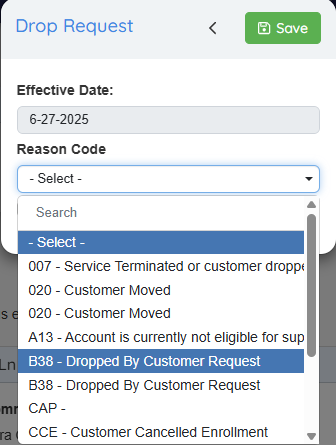
A pop-up window will appear, which includes the Effective Date of the Drop Request, and a Reason Code for the operator to select. Use the Rule Manager to control which drop requests can be available to an OpsAdmin user.
In action:
For an outbound drop request from OpsAdmin, the account’s Confirmed Service End Date will be picked up as part of the API sync.
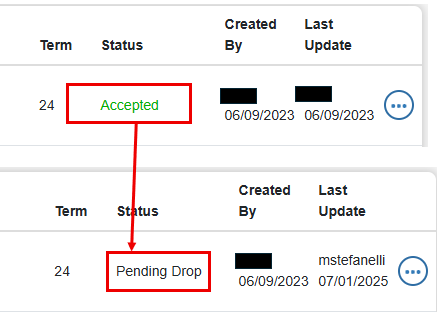
When a drop transaction is initiated from OpsAdmin, the record’s status will be updated to Pending Drop.
Dropped Account Record and Statuses
When an account has been dropped from OpsAdmin, the Status of the account will be updated from Accepted to Pending Drop.
Updating / Adding a Global Disposition for Drops (Configuration > Global Configuration > Drops)
These control the “Call Disposition” status which can be added to a record in the Drop Manager or designated Queue within the Drop Manager (Retention Queue, Winback Queue)
Sub statuses required for re-enrollment:
Final
Finaled
Pending Final
Pending Drop
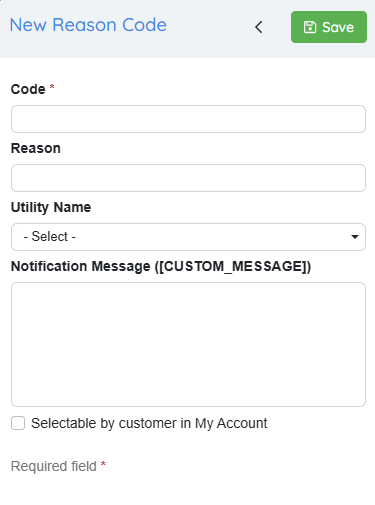
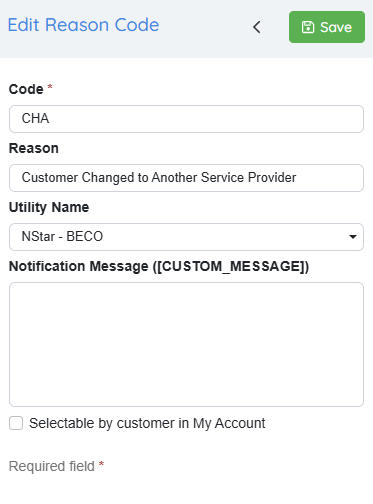
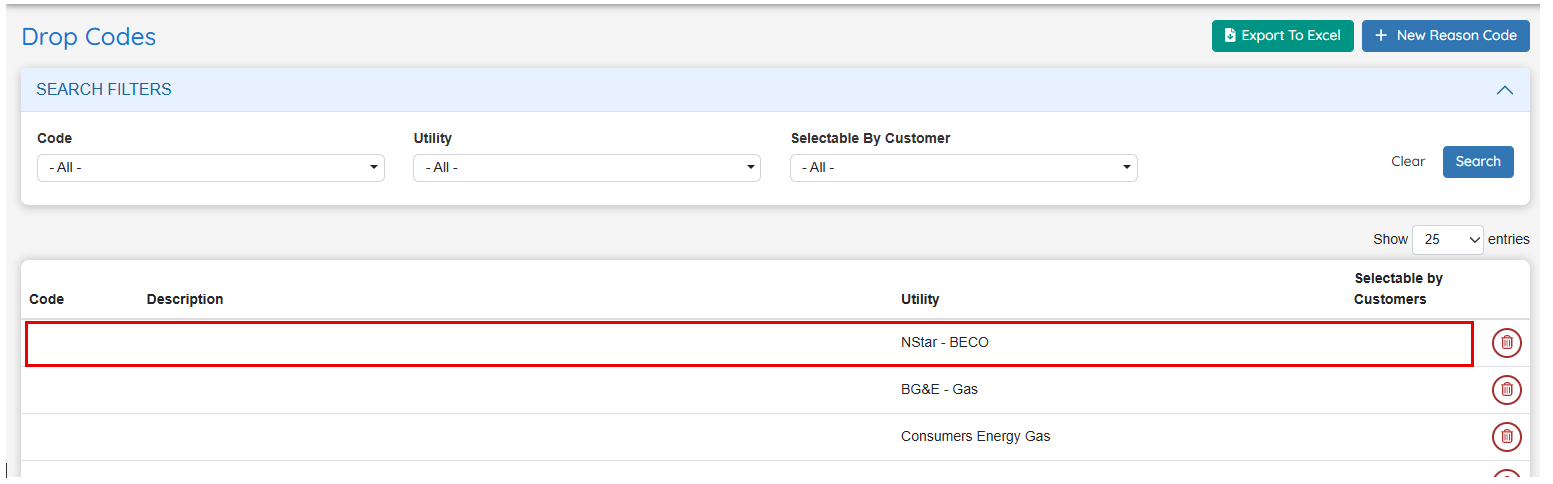
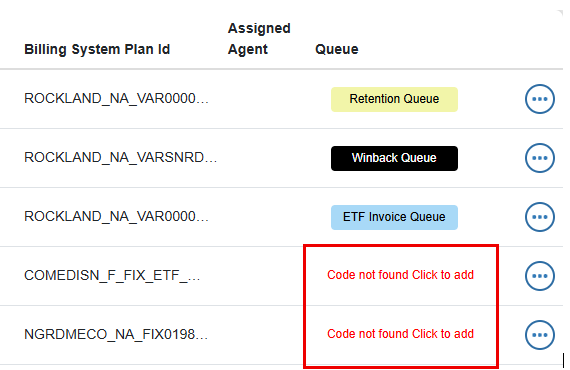
Adding Drop Codes to OpsAdmin (Drop Manager > Settings > Drop Codes)
To create a new Drop Code and Description, select the New Reason Code button in the upper right hand column.
To update an existing Drop Code and Description, select anywhere in the Utility row, each should have a delete button on the right.
.Mapping:
Rules:
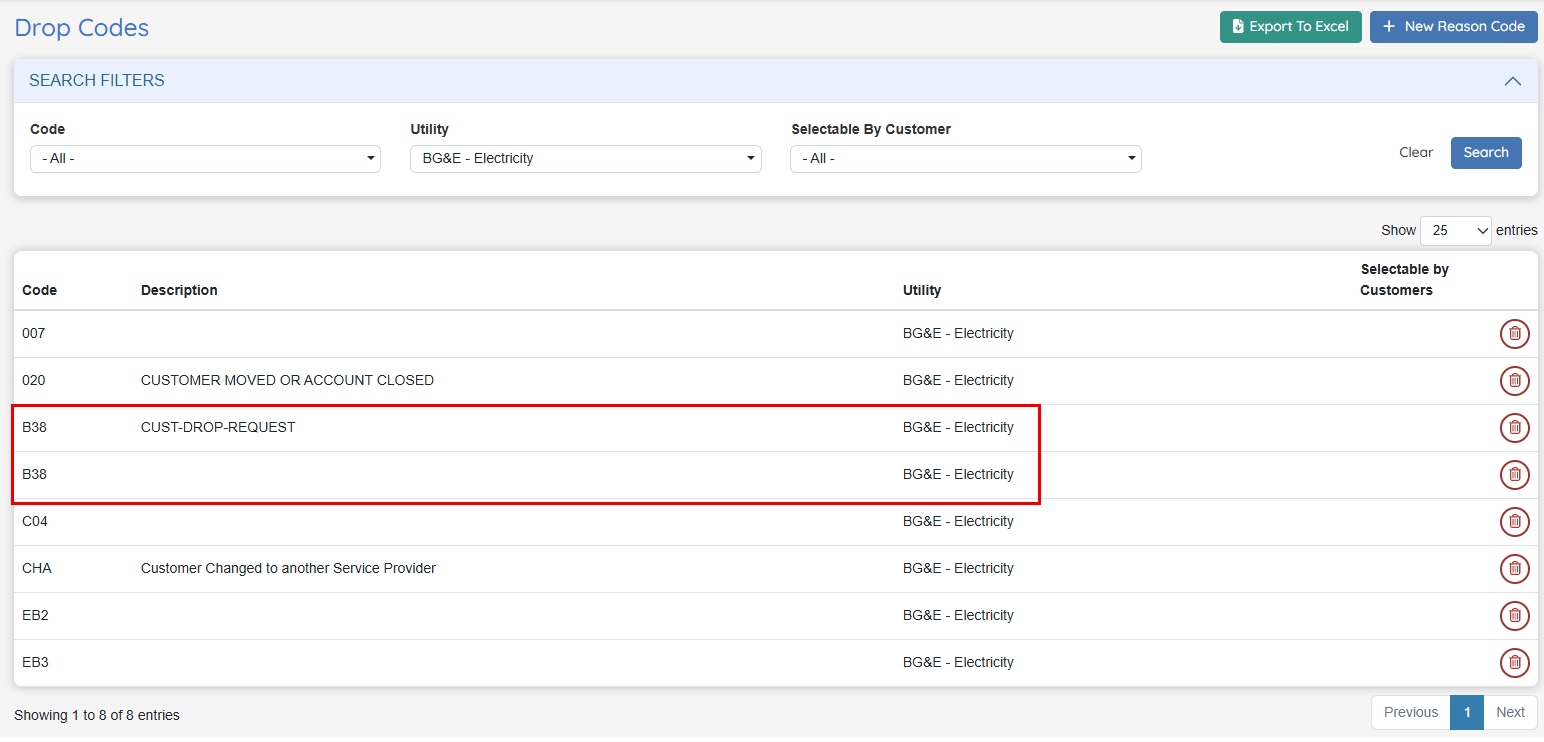
Codes are not unique and duplicate codes can exist to accommodate variations from EDI transaction data.
For the dropped record to be imported into OpsAdmin, the Code and Description must match the Code and Description from the applicable data source (Billing System Code)
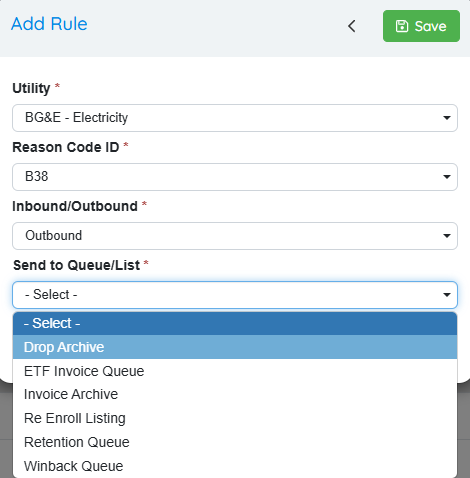
Assign Drop Codes to the Drop Rules Manager
After a Drop Code and Reason have been added to the Drop System (Drops > Settings > Drop Codes), a Rule must be added to each record in the Drop Codes section of the Drop Manager..
Using the Rule Manager, a one-time set-up is required for each Drop Code/Reason combination that has been set-up in the Drop Manager.
Steps:
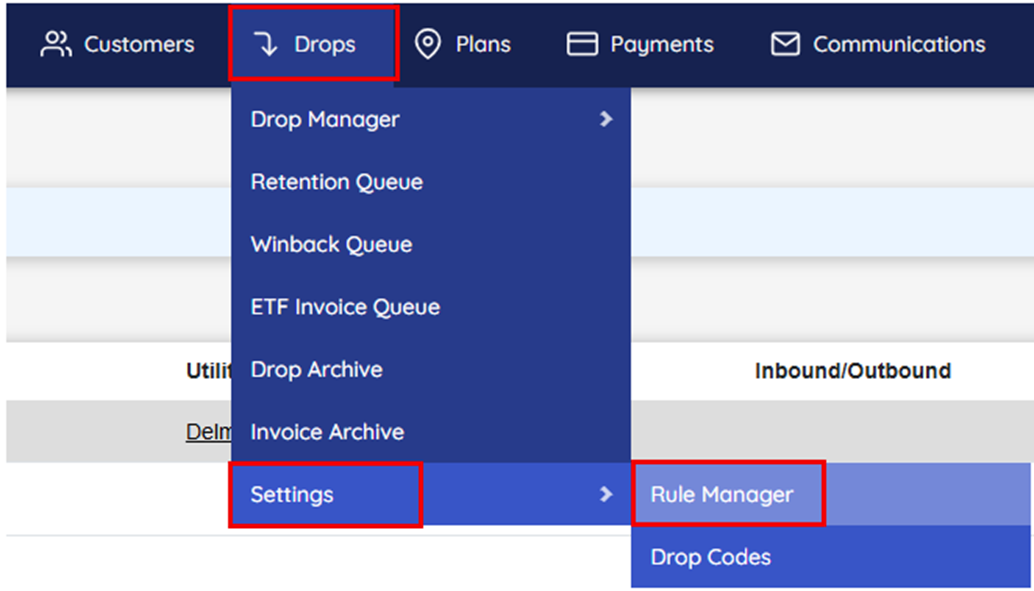
Go to Menu item Drops > Settings > Rule Manager
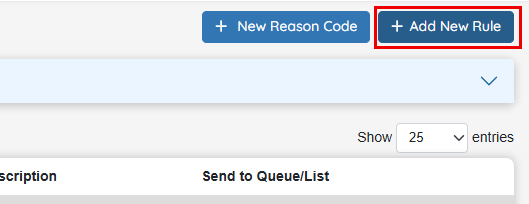
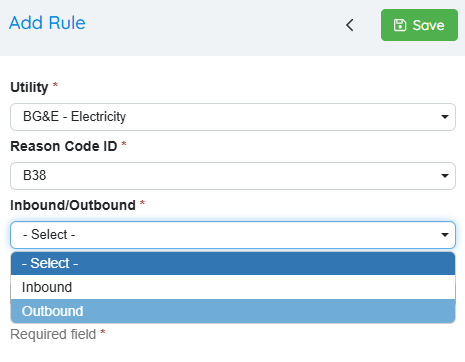
Select the button with the description “+Add New Rule” in the upper right hand corner of the user-interface.
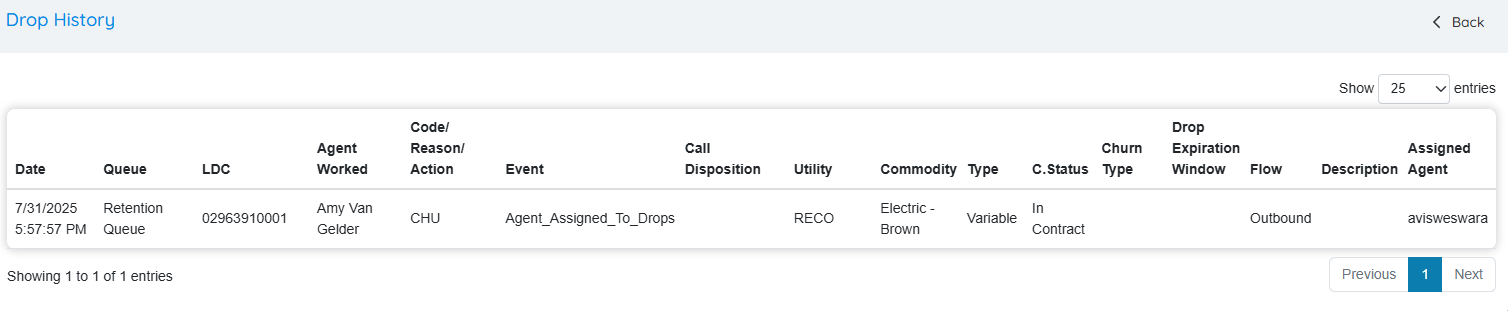
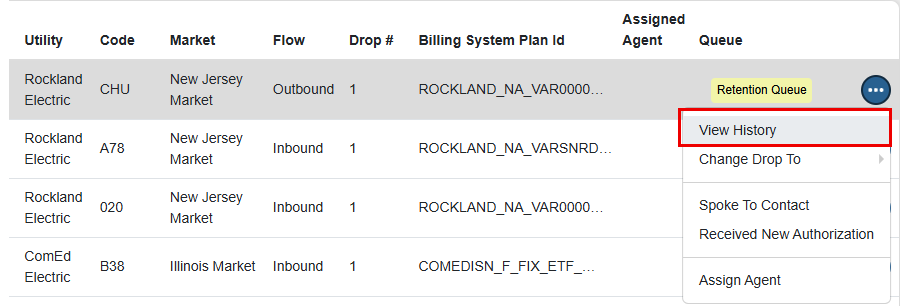
View History
Click on the 3 dots to display a list of available actions for a particular record. Select “View History” to display a list of each drop transaction received on an account.
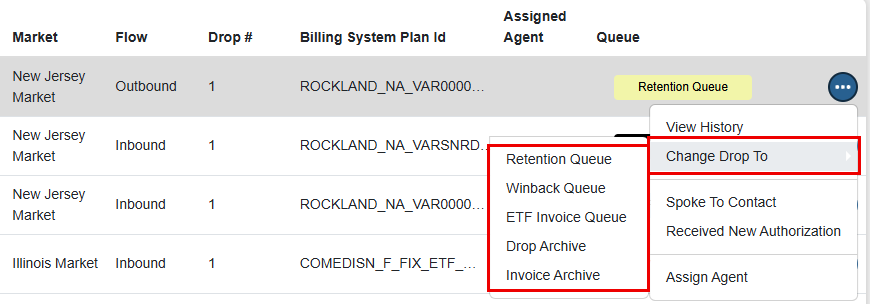
Change Drop Record to a Different Queue
Any record in the Drop Manager can be moved to a different queue. To move the dropped record to a different queue, click on the 3 horizontal dots on the record and select the “Change Drop To” option.
Available queues:
Retention Queue
Winback Queue
ETF Invoice Queue
Drop Archive
Invoice Archive
Spoke to Contact
A record can be updated to indicate that the Agent spoke to the customer. This option is available both from the Drop Manager and from its designated queue. To document that the customer has been reached, click on the 3 horizontal dots on the row of the account being updated, and select the “Spoke to Contact” option.
Received New Authorization
A record can be updated to indicate that the Agent received new authorization (i.e., was retained or won back). This option is available both from the Drop Manager and from its designated queue. To document that the customer has received new authorization, click on the 3 horizontal dots on the row of the account being updated, and select the “Received New Authorization” option.
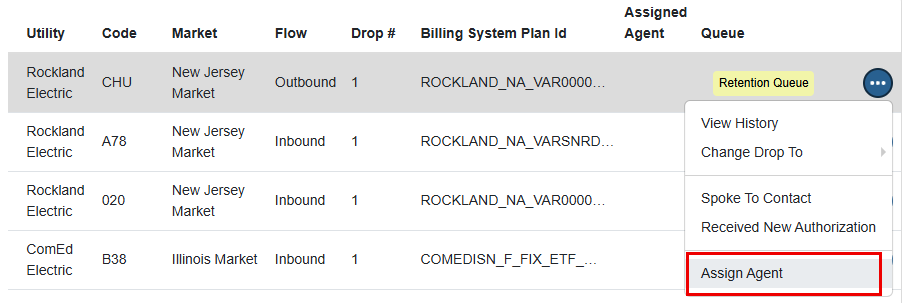
Assign an Agent to a single account or multiple accounts to work
Agents are assigned to a record from the main Drop Manager screen. To assign an Agent, click on the 3 horizontal dots on the row of the account being assigned, and select the “Assign Agent” option.

Using the Filter Records band at the top of each respective Queue, the Assigned Agent field can be used to filter/isolate records by the assigned Agent.
Drop Option in Customer’s My Account Portal
The option to drop enrollments from My Account has been overhauled. It is now easier to find the option. The “Manage” menu on the top right corner now has a label instead of simple hamburger icon
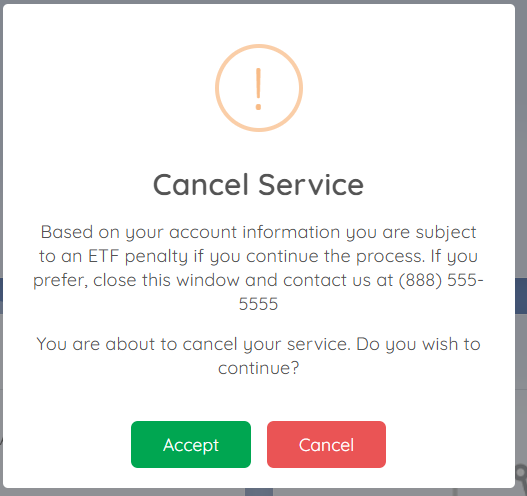
When a customer selects the Cancel or Move Out option, the system will first display a confirmation message asking whether they wish to proceed.
If the account has a pending Early Termination Fee (ETF), this message will also include a notice informing the customer that an ETF fee is applicable.
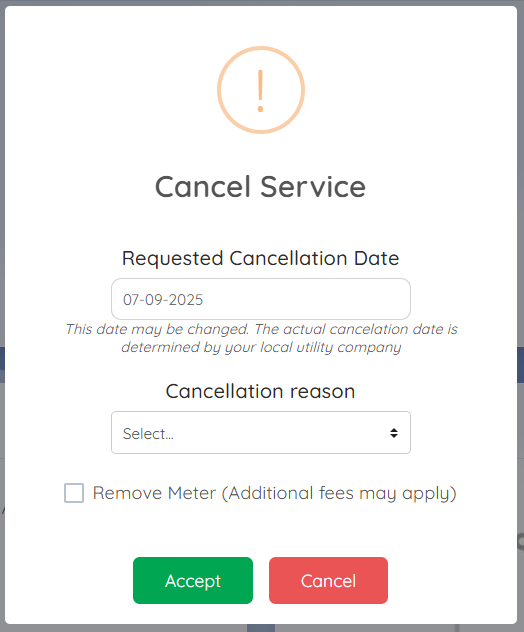
If the customer chooses to continue, they will be presented with a short form where they must: enter the date they’d like to cancel, select a cancellation reason (if multiple options are available), and indicate whether they want to request meter removal.
There are several options and configurations that affect these screens. Below are the different configuration screens that should be considered.
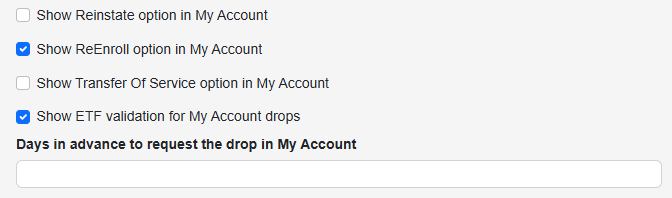
System Setup (Configuration > System Setup > Other)
Ability to configure whether the ETF message should be presented to the customers or not
If not, the customer will be able to drop their account, independently of whether or not an ETF would apply to the account.
Configure the number of days in advance a drop can be requested.

Customer Types (Customers > Settings > Customer Types):
A new setting is now available in Customer Types that determines whether the Drop option should be visible to customers in My Account. This replaces the previous configuration found in System Setup.